Most fishing apparel brands don't fail because of bad designs. They fail because the founder had no idea it would take 14 months, three rounds of sampling, and a fabric supplier of fishing apparel going silent two weeks before the target launch date.
The gap between "I have a great idea for a performance fishing shirt" and an actual product sitting in a warehouse isn't just money. It's a sequence of decisions — each with its own timeline, cost, and consequence.
This guide maps out the entire fishing apparel design process from start to finish. You'll go phase by phase, from your first mood board to your first bulk shipment of UPF fishing clothing . The timeline is built around what this industry actually demands:
Functional fabric certifications
Tournament jersey deadlines
A fishing community that buys on a seasonal schedule and sticks with brands they trust
Market Research & Brand Positioning
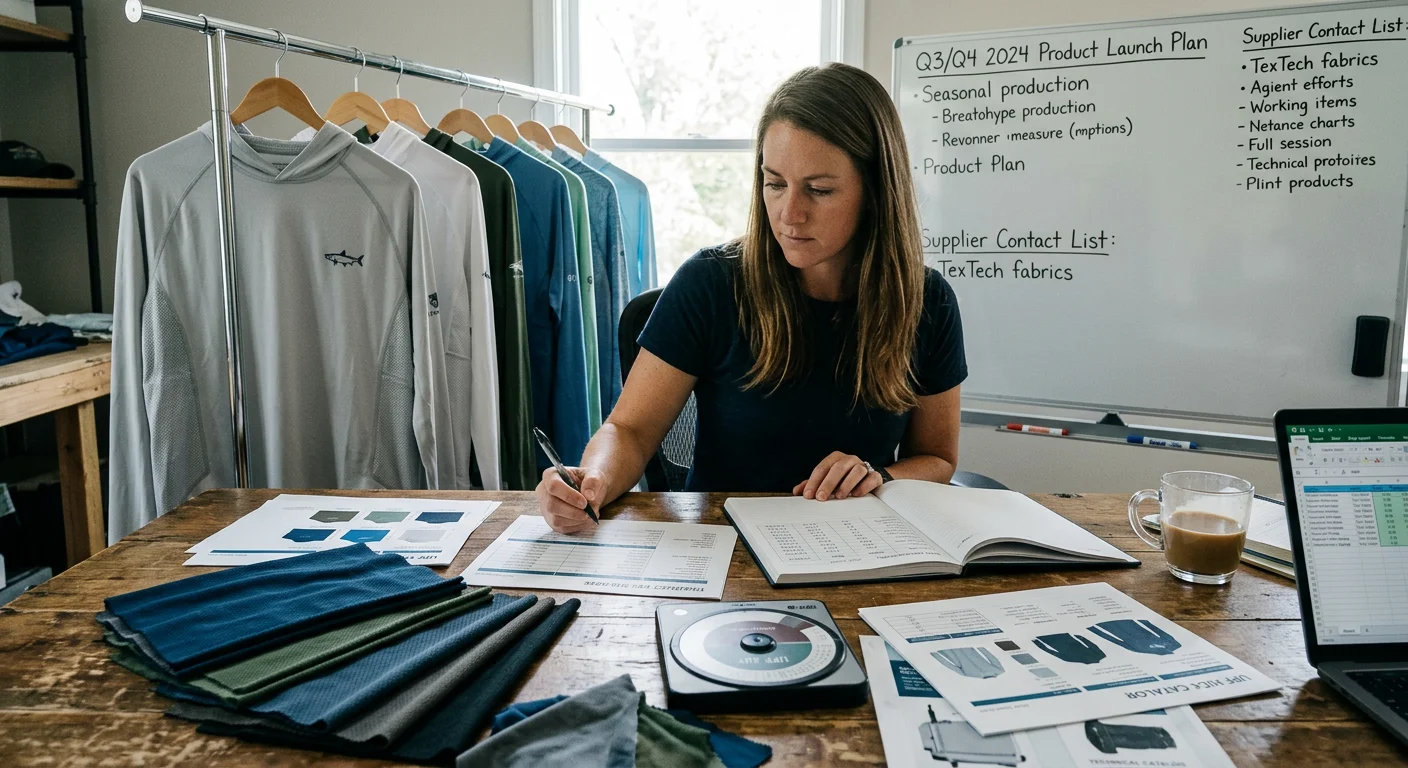
Phase 1 | Weeks 1–8 | Budget: $0–$300
Eight weeks. That's all you need to build the research and positioning foundation for your fishing apparel brand — do it right, and you're set.
Most founders skip this phase or rush through it. They already "know" their customer because they are their customer. That assumption has killed more promising private label fishing apparel brands than bad designs ever will. A bass angler in Georgia who fishes three times a week shares almost nothing with a tournament kayak angler in the Pacific Northwest. Different sun exposure windows. Different budget bands. Different buying triggers.
Your job in Phase 1 is to close that assumption gap with real data.
Step 1: Run Scrappy Customer Research (Weeks 1–3)
You don't need a market research firm. You need a Google Form and a willingness to show up in fishing communities.
Here's the low-cost research mix that works:
Customer interviews (6–12 minimum): Cover bass, offshore, fly, kayak, and tournament anglers. Run them on Zoom or phone. Budget $0–$50 in gift cards to incentivize participation.
Online surveys (50–100 responses): Post into fishing Facebook groups, Reddit communities like r/fishing and r/flyfishing, and kayak or tournament forums. Cost: $0–$100 with a small ad spend boost.
Social listening and forum scraping: Go through major fishing communities and look for apparel complaints and wishlists. What are people saying is missing? What brands do they love — and why? Cost: $0.
Competitor audit: Pull pricing, features, and positioning from 10–20 brands' product pages and social feeds by hand. Build a simple spreadsheet. Cost: $0.
Target spend: $50–$200 total. Everything beyond that is overhead you don't need yet.
The goal isn't volume — it's language . You want to hear how anglers describe their pain points in their own words. "This shirt makes me sweat through a full offshore day" is worth more than any trend report.
Step 2: Map the Competitive Landscape (Weeks 3–5)
Take your interview data and build a price-to-feature matrix across the brands you've audited. This is where your fishing apparel design process starts to get concrete.
Key market benchmarks to anchor against:
UPF performance long-sleeve tops: $25–$60 depending on fabric tech, brand positioning, and logo prestige
Technical offshore shells/jackets: $150+ at performance tier, with premium membranes pushing above $200
For every product in your competitor audit, capture these dimensions:
Fabric type: polyester, recycled blends, bamboo/eco fibers, anti-microbial, quick-dry
Sun protection level: UPF 30 vs. UPF 50+
Fit range: men's-only vs. women-first, extended sizes up to 3XL or 4X
Use case: inshore/bass, offshore bluewater, wading/fly, kayak, tournament jerseys
Sustainability claims: recycled content percentage, water-based dyes, certifications
This audit will surface something important — the whitespace . The most underserved opportunities in the outdoor category tend to cluster around:
Gap | Price Band |
|---|---|
Women-first performance fishing shirts with real technical specs | $40–$55 tops |
Extended sizes (up to 4X) without "big & tall" stigma | $35–$50 tops |
Eco-blend UPF fishing clothing with a clear sustainability story | $45–$60 tops |
Niche fishing tournament jerseys custom with premium graphics | $70–$120 |
Pick 2–3 unowned attributes you can credibly claim. That's your whitespace. That's where your brand lives.
Step 3: Define Your Position and SKU Set (Weeks 5–8)
Take your competitive data and write your positioning statement using this framework:
For [core angler niche] who face [specific apparel pain], [brand] is the [fishing apparel category] that delivers [primary benefit]. Unlike [legacy mass brands], we [evidence-backed differentiator].
Real examples that come out of solid research:
"Women-first offshore fits in extended sizes"
"Eco-blend UPF shirts tuned to local bass and kayak seasons"
"Tournament-ready tops that stay cool on 10-hour days"
Keep your initial SKU count tight — 3 to 5 products maximum. A focused launch is a fundable, manageable launch. A strong starting matrix looks like this:
2 UPF long-sleeves: one eco-blend women-first fit at $45–$55, one unisex extended-size option at $35–$45
1 sun hoodie: offshore/kayak-ready, UPF 50+, lightweight, priced $55–$70
1 neck gaiter or technical cap: $18–$30 for gaiters, $25–$40 for caps
Map each SKU to a season launch window from day one. The fishing apparel market runs on a tight seasonal clock:
Spring (Feb–Apr): UPF long-sleeves for bass pre-spawn and early kayak season
Summer (May–Aug): Sun hoodies, neck gaiters, offshore protection focus
Fall (Sep–Nov): Layering pieces for fly and steelhead
Winter (Dec–Jan): Tournament schedule drops, limited-run collab tops
Launch out of sync with fishing seasonality and your brand takes a hit before it even gets going. Nail this calendar in Phase 1 — before a single sample is cut. It's one of the highest-impact decisions you'll make across the entire sportswear brand development timeline .
Phase 1 Deliverables Checklist
Before moving to fabric sourcing and supplier outreach, have every one of these locked down:
Ideal Customer Profile (ICP) defined for your launch segment
Positioning statement written and stress-tested with 10–15 validation interviews
Perceptual map: your brand vs. 6–10 competitors on axes like performance vs. eco, women-first vs. unisex, premium vs. value
Whitespace summary: 2–3 unowned attributes you will own
SKU matrix: 3–5 products with target price bands, angler segments, and season focus
Competitor audit: 10–20 products with fabric, fit, pricing, and positioning notes
Moodboard: 20–30 reference images tied to target regions and seasons
Pricing validation: ≥60% WTP acceptance within ±15% of your anchor price across 15–20 interviews per SKU
Total Phase 1 investment: $50–$300 and 8 weeks. What you walk away with isn't just a brand concept. It's a defensible market position backed by real angler data, a seasonal product roadmap, and a clear brief ready to hand your first performance fishing shirts manufacturer .
Business Setup & Financial Blueprinting
Phase 2 | Weeks 9–12 | Budget: $200–$1,500
Paperwork isn't glamorous. But skip the legal and financial foundation in Month 2, and your fishing apparel brand hits a wall. You won't be able to open a supplier account, accept wholesale orders, or protect your name from a copycat.
Do this right once. It takes four weeks.
Register the Entity and Separate the Money
Form an LLC. In most US states, self-filing online costs $100–$250 in state fees. No attorney needed at this stage. Add a registered agent only if your home address won't work — that runs $0–$150/year . Your EIN (federal Tax ID) is free through the IRS website. It takes 15 minutes.
Once the entity exists, open a dedicated business bank account — day one, no exceptions. Online fintechs like Mercury or Relay offer free plans with zero minimum deposit. Run every dollar through that account. Mixing personal and business spend is the single fastest way to lose track of your real burn rate.
Entity + banking total: $100–$400. That leaves the rest of your budget for what builds the brand.
Allocate Your Starting Capital with the 30/45/10/15 Framework
Most first-time founders spend money in the wrong order. This framework keeps spending on track:
Bucket | Allocation | $1,000 Example | $200 Example |
|---|---|---|---|
Sampling & testing | 30% | $300 | $60 |
Initial production / MOQ | 45% | $450 | $90 |
Tech & assets | 10% | $100 | $20 |
Pre-launch marketing reserve | 15% | $150 | $30 |
At $1,000 , your sampling budget covers about 10 fabric swatches ($50), three proto garments ($180), and $70 for shipping and QC photos. Your production allocation supports 45–65 units at a $7–$10 landed cost. That's enough to hit MOQ on one core style with most small performance fishing shirts manufacturers .
At $200 , you're working with micro-MOQs, print-on-demand, or consignment terms. That's a viable path — but negotiate hard on minimums before locking in a supplier.
Know Your Burn Rate Before You Touch Fabric
Run this simple math check before spending anything. It keeps you from running out of cash between sampling and launch:
Runway (months) = Cash on hand ÷ Net burn
Example: $1,200 in the account, $200/month in gross burn, zero pre-launch revenue → 6 months of runway
To stretch that runway across the full 12–18 month sportswear brand development timeline , compress net burn to $70–$100/month until real sales come in. That means hard prioritization. Keep SaaS tools free or cheap. Defer photography until samples are finalized. Hold off on paid ads until you have inventory to sell.
Also plan for volatility — it will hit you:
- Fabric cost spikes: Build in a 10–20% price buffer on all material estimates
- Freight delays: Plan for 8–12 week lead times on imports, with a 2–3 month cash buffer for reorders
- Seasonality: Build your cash flow model around two major inventory cycles per year (Spring/Summer and Fall/Winter). UPF fishing clothing demand moves in peaks and valleys, not a straight line.
Build the Financial Model Now, Not Later
A 12-month operating spreadsheet with columns for each month isn't optional. It's your decision-making tool for every phase ahead. Structure it with:
Revenue forecast: units × price per SKU
COGS: fabric, production, freight, packaging/labels
Operating expenses: SaaS, storage, marketing, professional fees
Bottom lines: gross profit, net cash flow, burn rate, runway
Build three scenario tabs: base, downside (50% revenue, same costs), upside . The downside tab is the one you'll reference most.
Compliance and IP: Protect the Brand Early
Two areas most founders underinvest in:
Textile labeling compliance: Every garment you sell must include fiber content, care instructions, and country of origin. That's a legal requirement, not optional. Start a compliance log on day one. Track supplier, fabric composition, certifications (OEKO-TEX, UPF test reports), and HS codes for fishing clothing fabric sourcing imports.
Trademark: A basic self-filed US trademark application costs $250–$350 per class in government fees. Attorney-assisted filings run $800–$1,500+ . On a lean budget, file one class yourself once your brand name is locked in. At minimum, document dated brand use records and run a public database conflict check before launch.
Phase 2 Deliverables Checklist
LLC (or local equivalent) registered; articles of organization and business certificate on file
EIN / Tax ID obtained and stored
Dedicated business bank account open; bookkeeping tool connected on day 1
30/45/10/15 capital allocation applied to your actual starting budget
12-month operating spreadsheet built with base, downside, and upside scenarios
Burn rate and runway formula live in the spreadsheet
Compliance log created: supplier, fabric composition, certifications, label requirements
Trademark search completed; application filed or deferred with dated brand use records
Storage solution identified: micro-warehouse ($100–$300/month) or 3PL intent letter signed
Total Phase 2 investment: $200–$1,500 over four weeks. Phase 3 covers fabric sourcing and supplier outreach for your outdoor apparel supply chain . By then, you'll have a legal entity, a funded account, and a model that shows you precisely how much runway each supplier decision buys or costs.
Fabric Sourcing & Supplier Selection
Phase 3 | Weeks 13–24 | Budget: $800–$2,500
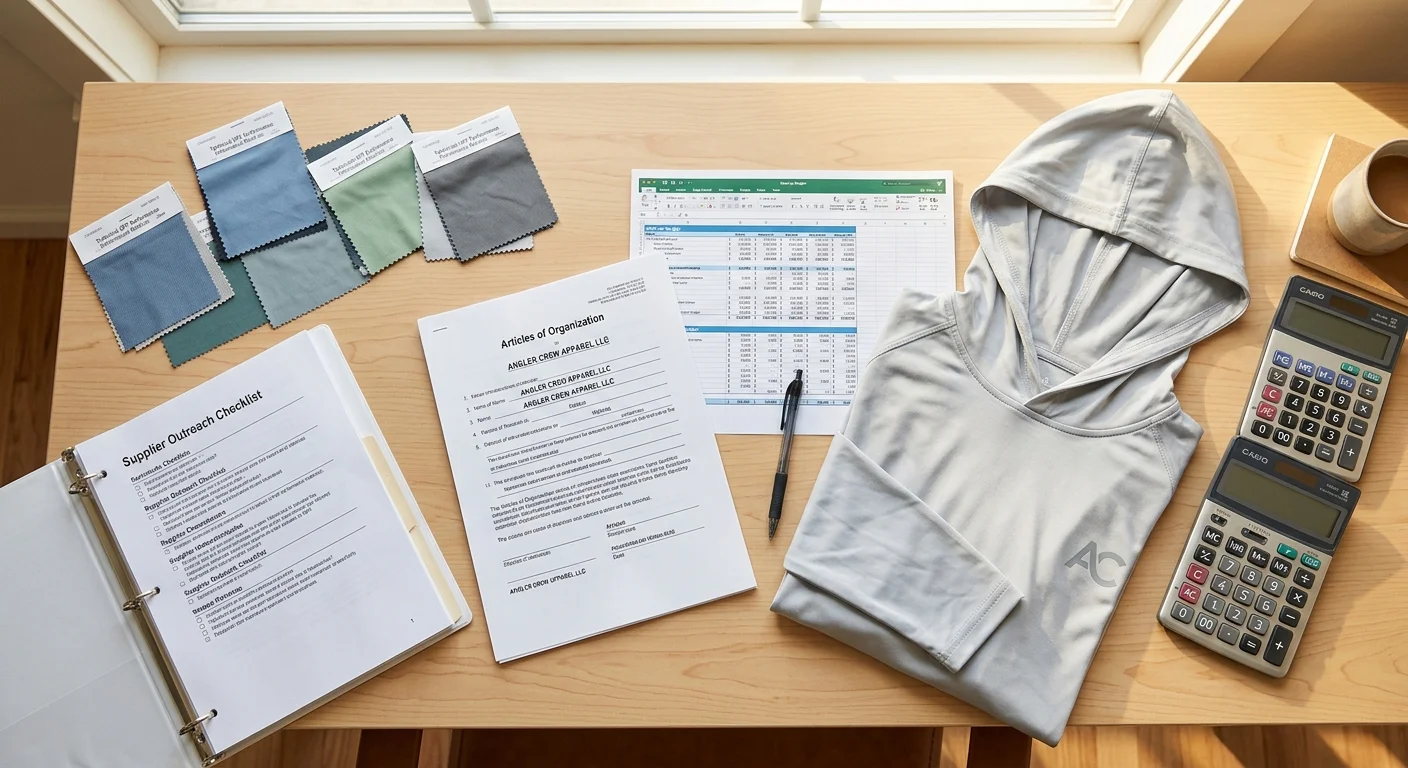
Fabric choice is where fishing apparel brands split from generic activewear brands — for good. Get this right, and every downstream decision — sampling, production, pricing, marketing — gets easier. Get it wrong, and no clever branding saves a shirt that soaks through on a July offshore day.
Here's what the fabric selection process looks like for UPF fishing clothing when you run it right.
Understand the Fabric Specs That Matter
Not all "sun protection" claims are equal. Two numbers drive every buying decision in performance fishing apparel:
UPF 30: blocks 97% of UV radiation — acceptable for casual use
UPF 50+: blocks 98%+ UV — the standard your brand should target for any moisture wicking fishing gear built for performance-grade use
The fiber blend matters just as much as the UPF number. Polyester/spandex leads serious fishing clothing fabric sourcing for three solid reasons: better sun protection than cotton, faster moisture management, and stronger odor control across long fishing days. The data backs this up. Polyester blends wick moisture 3× faster than cotton . Field-tested performance fabrics dry sweat 60% faster and cut heat buildup by 4°F compared to standard cotton shirts.
Your target fiber composition for core performance fishing shirts : 90–95% polyester / 5–10% spandex , with fabric weight in the 120–180 g/m² range for warm-weather use. That blend also puts you above the ≥85% polyester threshold needed for sublimation printing fishing shirts — a must if custom tournament fishing jerseys are in your SKU plan.
One certification detail most founders miss: require suppliers to cite ASTM D6603 on their UPF test reports. Generic "sun protection" language on a hang tag means nothing. That standard is the line between a defensible claim and a compliance liability.
Source Fabric Swatches Before Committing to Any Manufacturer
Start with fabric, not factories. Mill swatches are cheap. Switching manufacturers after proto samples are cut costs far more.
Proven sourcing channels for UPF technical knits and fishing substrates:
Runfish Apparel — builds UPF 52–58 fabrics with documented moisture-wicking, cooling, and wash-test records, built for fishing apparel buyers
Wazoodle Fabrics — every fabric tagged with a clear UPF rating; good for quick spec validation
Discovery Fabrics, Rockywoods, Seattle Fabrics — specialty technical outdoor suppliers used by activewear manufacturers on a consistent basis
Ask each supplier for the full data package: UPF value, fiber content, fabric weight, and — most important — wash-test durability records showing retained UPF and wicking performance after 20–50 wash cycles . That last data point is where cheap technical fabrics fall apart.
Budget for this stage: $300–$800 covers swatches, express shipping, and independent lab tests on your 3–5 shortlisted fabrics. Independent UPF lab testing runs $60–$150 per fabric . That's worth every dollar before you commit sampling yardage.
Run these three field tests on every swatch before sending anything to a lab:
Quick-dry test: wet a corner with tap water — target dry within 60 seconds ; reject anything still damp after 2 minutes
Stretch and rebound test: stretch weft and warp by hand — the fabric should snap back clean without distortion
UPF documentation check: confirm an explicit UPF number plus ASTM D6603 reference on the tech sheet — not just marketing copy
Build Your Manufacturer Shortlist Around Non-Negotiables
Narrow fabric down to 3–5 candidates first. Then manufacturer selection follows a clear filter sequence. The remaining $500–$1,500 of your Phase 3 budget covers sampling yardage and proto garments from 2–3 candidate manufacturers.
Non-negotiable supplier criteria for your outdoor apparel supply chain :
Certifications (require documentation, not promises):
- ISO 9001 — quality management system
- OEKO-TEX® — chemical safety compliance
- WRAP or equivalent ethical audit — retail buyers and wholesale accounts are putting more weight on this now
Technical capabilities (confirm before sampling):
- Proven track record with polyester/spandex performance blends
- Sublimation printing compatibility on your chosen fabrics
- Antimicrobial and stain-resistant finish options — backed by test data confirming UPF ratings hold after finish application
MOQ reality check for early-stage brands:
- Domestic/nearshore partners: negotiate 50–200 units per style/color — reachable with premium pricing leverage
- Overseas partners: the typical floor sits at 300–500 units per style/color , with some factories requiring 500–1,000
- Below-MOQ surcharges are standard — expect +10–20% per unit for orders under minimum thresholds; factor that into your unit economics before committing
Lead time benchmarks to build into your project calendar:
- Fabric knitting/weaving: 2–4 weeks
- Dyeing and functional treatments: 2–3 weeks
- Cut, sew, and sublimation print: 3–5 weeks
- Proto sample turnaround: 2–3 weeks from fabric receipt, at $50–$100 per style
Lock these timelines into your Gantt chart now. A fishing tournament jerseys custom run for a spring circuit has zero flex — suppliers who can't commit to documented lead times are a liability, not a cost saving.
Negotiate the Supply Agreement Before Sampling
Most founders treat the contract as an afterthought. Experienced operators use it as a sourcing tool. Before proto samples are cut, get these commercial terms in writing:
Payment structure: standard split is 30% deposit at bulk PO confirmation (covers fabric purchase and production booking), 70% balance before shipment
QC tolerances: size measurement tolerance ±1–1.5 cm; color shade tolerance ΔE ≤ 1.0–1.5 versus approved lab dips; defect rate at AQL 2.5 for major defects
Fabric performance KPIs in the contract: UPF must meet or exceed stated spec at inspection; quick-dry standard of dry feel within 60–90 seconds must pass on finished garments
Sample fee deductibility: ask whether proto sample costs count toward your first bulk order — many manufacturers offer this; most won't bring it up on their own
Phase 3 Deliverables Checklist
4–8 fabric swatches sourced with full data sheets: UPF rating, fiber content, weight, ASTM D6603 reference
Field tests completed on all swatches (quick-dry, stretch/rebound, documentation check)
Independent lab tests ordered on 3–5 shortlisted fabrics ($60–$150 per test)
Wash-test durability records collected for shortlisted fabrics (20–50 cycle performance)
Fabric library finalized: 4–8 approved options with signed lab dip documentation
Manufacturer shortlist of 3 suppliers with ISO 9001, OEKO-TEX®, and UPF test report verification
MOQ, lead time, and sampling policy confirmed in writing with each supplier
Supply agreement in place: 30/70 payment terms, QC tolerances, fabric performance KPIs
Initial bulk deposit (30%) staged and ready to release once proto samples clear approval
Total Phase 3 investment: $800–$2,500 over eight to twelve weeks. You're not just buying fabric samples. You're building verified technical credibility behind every claim your brand makes about UPF fishing clothing production . The ASTM D6603 test reports, the OEKO-TEX certifications, the wash-test durability records — these form your brand's proof stack. You'll pull them into product listings, wholesale pitch decks, and press outreach down the line. Build the documentation habit now. It pays off across every phase ahead.
Sampling & Functional Testing
Phase 4 | Weeks 25–36 | Budget: $500–$2,000
Three rounds. That's what separates a production-ready performance fishing shirt from an expensive mistake sitting in a warehouse.
Most founders treat sampling like a formality — one proto, a quick fit check, approve and move. In fishing apparel design , that shortcut costs you. A shirt looks perfect on a table sample. Then someone drops into a forward casting stroke or leans over the gunwale to net a fish — and it falls apart. You discover that in motion. That's what this phase is built around.
Run Three Rounds, Each With One Job
The sampling path for UPF fishing clothing production follows three clear steps: proto → fit sample(s) → pre-production master . Each round has one decision focus. Mix them together and you stretch your timeline. Your feedback gets murky too.
Round 1 — Construction validation: Check the core pattern, seam placement, and fabric behavior under tension. No fit judgments yet.
Round 2 — Fit and pattern correction: Work through the size range (S–3XL). Compare every key measurement against your spec sheet. Keep corrections within ±0.5 in on critical points of measure. Anything outside that tolerance goes back.
Round 3 — Pre-production sign-off: This is the golden sample. Lock the artwork. Confirm grading. Document master measurements. Nothing moves to bulk production without a signed-off PP sample in hand.
Each overseas cycle runs 4–8 weeks . Domestic iterations can compress to 1–3 weeks . Map this into your Gantt chart against your target season window. A Spring UPF launch leaves zero buffer for a fourth round.
Test for What Fishing Does to a Garment
Four construction details make or break moisture wicking fishing gear in field conditions. None of them show up on a flat spec sheet:
Extended rear hem: boat coverage and wading protection when bending forward
Articulated shoulders: full casting range with no pulling or bunching across the back
Hood depth: sits flush over a cap brim without blocking sightlines
Reinforced pocket stitching: holds under tackle and rod load with no seam separation
These features need to be worn, not measured. Before Round 2 approval, get samples on real anglers.
Structure Your Field-Test Program
Local charter captains, tournament teams, and micro-influencer anglers make your best functional testers. They fish full days in real conditions. Lab metrics can't replicate a 10-hour offshore session in July heat.
Give every field tester a structured feedback form. Capture these seven metrics per wear session:
Range of motion during casting strokes
Hem coverage when bending, reaching, or wading
Hood compatibility with cap and brim wear
Pocket durability under tackle load
Dry time after spray, sweat, or a quick wash
Breathability across a full session
Fit consistency from S to 3XL across different tester body types
This field-test report becomes a production document — not just feedback. Log every fit or pattern edit. Trace each one back to a specific tester note. Build all of it into the Round 3 master sample.
Lock the Functional Tests Before Signing Off
Beyond field wear, run these six lab and inspection checks before pre-production approval:
Seam integrity under stress load
Colorfastness under UV exposure — critical for sublimation printing fishing shirts where panel graphics fade fastest at seam edges
Print alignment on sublimation panels across the full size run
Breathability benchmarked against your spec
Drying speed — target dry feel within 60–90 seconds per your Phase 3 fabric standard
AQL 2.5 inspection at General Level II — covering appearance, dimensions, labeling, barcodes, and documentation
Phase 4 Deliverables Checklist
2–3 proto samples produced and construction-validated in Round 1
Full size run fit corrections completed in Round 2; measurements within ±0.5 in of spec
Field-test program completed with charter, tournament, or micro-influencer anglers
Field-test feedback report finalized with all fit and pattern edits documented
Six functional tests cleared: seam integrity, colorfastness, print alignment, breathability, dry time, AQL 2.5
Final grading rules and measurement spec sheets locked per SKU
Final artwork files approved for production print plates
Production-ready master sample signed off by both brand and manufacturer
Total Phase 4 investment: $500–$2,000 over eight to twelve weeks. You're not just buying confirmed fit. You're building a documented proof chain — field-tested construction, verified functional performance, and a golden sample your manufacturer builds every bulk unit against. That master sample becomes your single source of production truth for everything that ships.
Bulk Production & Order Placement
Phase 5 | Weeks 37–52 | Budget: $4,000–$15,000
That signed pre-production sample on your desk is the last low-cost decision you'll make for a while. From here, every step involves real money, real lead times, and real consequences.
Here's the realistic window: 8–14 weeks from PPS approval to goods delivered . Most factories quote 4–6 weeks. Experienced brand operators ignore that number. They plan for 12–14 weeks and treat anything faster as a bonus.
Release the Deposit, Lock the Slot
Paying your production deposit is more than a financial transaction — it's a scheduling commitment. Your order doesn't exist on the factory floor until that deposit clears. Once it does, the bulk workflow starts:
Fabric and trims checked against approved standards (GSM, shade lot, specs)
Cutting → sewing → sublimation printing → finishing and packing
Bulk cutting through finishing: 3–6 weeks based on style complexity and volume
For a first run of 1–3 core SKUs across 2–3 colorways , here's what your component timeline looks like after deposit release:
Stage | Time Window |
|---|---|
Fabric arrival to factory | 1–6 weeks |
Bulk cut, sew, finish | 3–6 weeks |
QC and packing | ~1 week |
Sea freight (Asia → US) | 4–6 weeks |
Air freight (launch-critical SKUs) | 1–2 weeks |
Total: 8–14 weeks is the working number. Build to 14. Brands that plan around 8 weeks miss their tournament season window. Don't be one of them.
Run QC at Three Points — Not One
A single final inspection is a reactive strategy. Inline QC is where you control output quality. Build your inspection program around three checkpoints:
First-article check: Pull the first 5–10 pieces off the line. Check stitch quality, print placement, and measurements against your golden sample before the full run continues.
Mid-line inspection (30–50% completion): Focus on color batch consistency across fabric rolls, sublimation print alignment at seam edges, and tension uniformity. This is where colorfastness issues on sublimation printing fishing shirts tend to show up. Catching them here saves the run.
Pre-packing final inspection: Run AQL 2.5 random sampling on finished goods. Measure at least 10% of the batch against your approved spec. Check packaging too — hang tags, care labels, polybags, and carton markings.
Color variation between fabric rolls is the top bulk production failure point for performance fishing shirts . Verify shade lots before cutting. Make it a required step, not something you get to later.
Freight Mode: Match the Decision to Your Timeline
Don't default to air freight on the whole order. It costs 2–5× more per kilogram than sea and cuts into your margin before you've sold a single unit.
Most early-stage private label fishing apparel brands split it this way:
Sea freight (80–90% of volume): 20–40 days transit on Asia-to-US lanes. Plan 4–6 weeks factory-to-warehouse, including customs and inland delivery.
Air freight (10–20% of volume): 3–5 days transit plus 2–3 days customs clearance. Reserve this for launch-critical SKUs or tournament jersey deadlines that can't move.
Add a 3–5 day logistics buffer on top of quoted transit times. Port congestion and customs delays aren't rare — they're standard on peak season lanes.
Concentrate Volume Before You Diversify Color
First-run inventory strategy is straightforward. Lock 2–3 hero colorways per style and put 60–80% of your production budget there. Secondary colors earn volume later — after sell-through data confirms demand.
At a $4,000–$15,000 first-order range, here's what that budget gets you:
$6–7 landed cost: 600–1,300 units
$3–5 landed cost: 1,000–3,000+ units
Both scenarios cover one core style with 2–3 colorways. That's the right scope for demand validation before you scale. Spreading the same budget across six colorways and three styles leaves you with thin inventory depth per variant, stockouts on your winners, and dead stock on your losers.
Phase 5 Deliverables Checklist
PPS signed and documented as bulk quality benchmark
Final quantities per style, size, and colorway confirmed in writing
Production deposit (30%) released; factory slot confirmed
Fabric and trims verified before cutting (GSM, shade lot, specs)
First-article check completed on initial 5–10 pieces
Mid-line inspection report captured at 30–50% completion (photos, defect rates, corrective actions)
Final random inspection report completed to AQL 2.5 on finished goods
Measurement check passed on ≥10% of batch
Packaging verified: tags, labels, polybags, carton markings
Freight mode confirmed: sea for bulk volume, air reserved for launch-critical SKUs
Commercial invoice, packing list, and bill of lading (or airway bill) submitted to freight forwarder
Exit factory date aligned with forwarder cut-off and vessel/flight booking
3–5 day logistics buffer built into launch calendar
Inventory tracking sheet live: mapped to PO numbers, SKUs, delivery dates
All QC reports, approved samples, and tech packs stored in digital library for reorders
Total Phase 5 investment: $4,000–$15,000 over sixteen weeks. What ships at the end isn't just inventory. It's proof of concept in physical form — built against a signed golden sample, cleared through AQL inspection, and landed in your warehouse on a timeline your fishing season launch can use.
E-Commerce Platform Setup
Phase 6 | Weeks 53–56 | Budget: $800–$2,500
Your inventory cleared customs. Your golden samples are archived. Now you need a storefront that turns cold fishing traffic into buyers — before your seasonal window closes.
Platform selection is the first decision. It's not complicated. Shopify Basic at $39/month gives you SSL, checkout, and core reporting straight away. WooCommerce is free for the plugin — you'll spend $30–$60/month on hosting, SSL, and a security stack. Either works. Shopify gets you live faster. WooCommerce gives you more flexibility down the road. Pick based on your technical comfort level, not theory.
Build Around the Product Page, Not the Homepage
Most first-time brand founders obsess over their homepage. Experienced operators focus on product pages — because that's where the sale happens.
For UPF fishing clothing , a standard product page template isn't enough. Your buyer needs to see functional proof before they add to cart. Build every product page with these elements:
Above the fold:
- A lifestyle shot showing the garment in a real fishing context — boat deck, shoreline, dock
- Price, three key benefits (UV protection, quick-dry performance, stretch)
- A clear primary CTA: "Add to Cart" or "Pre-Order Now"
Technical specs section — this is non-negotiable for performance fishing shirts :
- Fiber composition (e.g., 92% polyester / 8% spandex)
- UPF rating with a clear "UPF 50+" label
- Fabric weight in g/m²
- Moisture-wicking and anti-odor treatment notes
Sizing and fit block:
- Chest, waist, and hip measurements in both inches and centimeters
- Fit descriptor: Athletic, Relaxed, or Oversized
- A direct note: "Size up if between sizes" — this single line cuts return friction more than most brands expect
Social proof anchor:
- Verified reviews with star rating schema markup
- UGC lifestyle shots from field testers or first-batch community members
Your Media Budget Is Your Conversion Budget
You can't sell a moisture wicking fishing shirt with flat product photos on a white background. Anglers need to see the garment under sun, in motion, on water.
Set a realistic shoot budget:
- DIY half-day shoot (photo + short video): $300–$800
- Professional outdoor brand shoot : $1,200–$2,000+
For each SKU, produce at least:
- 3–6 lifestyle images — casting strokes, boat deck, dock
- 2–4 technical flat lays — seam close-ups, hood construction, thumb loops
- One 15–45 second video clip — fabric stretch demo, water repellency pour test, UV coverage zones
Put $400–$1,200 of your Phase 6 budget here. This is not a place to cut corners. Weak photography kills conversion rates before your SEO or paid traffic gets a chance to work.
Navigation and Site Architecture
Your fishing apparel store needs a navigation structure that matches how anglers shop — by activity first, product type second.
Top-level collections:
- By activity: Bass, Offshore, Kayak, Fly, Tournament
- By product type: Long-Sleeves, Sun Hoodies, Gaiters, Hats
Add filter options on collection pages: size, color, UPF rating , fabric weight. Anglers searching for sublimation printing fishing shirts or fishing tournament jerseys custom should land straight on a relevant collection — not scroll through an unsorted catalog.
Payments, Shipping, and Returns
Enable 2–4 payment methods at minimum: Stripe or Shopify Payments for cards, PayPal, Apple Pay/Google Pay, and a BNPL option like Shop Pay Installments for higher-ticket bundles. Each extra method you add lifts checkout conversion.
Set a free shipping threshold at $75–$100 to raise average order value. Post your handling time clearly — "ships within 2–3 business days" — and include a fit-specific return clause: 30-day window, free first exchange on sizing issues. Fishing apparel buyers are cautious about fit. Take that concern off the table before they hesitate.
The Tracking and Email Stack You Need at Launch
Install four things before you go live. Check that each one fires without error:
GA4 for sitewide analytics and ecommerce events
Meta Pixel for Facebook and Instagram retargeting
TikTok Pixel for TikTok Shop and ad attribution
Email capture popup offering first-access or a lead magnet (a "Sun Protection Fishing Checklist PDF" performs well for this audience)
Aim for 100–300 pre-launch email subscribers during the four-week setup window. Then run three automated sequences before your launch date:
Welcome series (3 emails): Brand story → fabric and UPF tech deep-dive → UGC and launch discount
Cart abandonment (3 emails): Product reminder → sizing FAQ and social proof → time-limited incentive
Pre-launch teaser (2 emails): T-7 days announcement → T-1 day "Tomorrow" email with direct CTA
On-Page SEO: Built Into the Architecture, Not Added After
Every product page needs these SEO elements in place before launch day:
Title tag format: "UPF 50 Fishing Sun Hoodie – Men's – [Brand Name]"
Meta description (120–155 chars): lead with the benefit, include the primary keyword without forcing it
Product description (300–600 words): problem/benefit narrative for anglers, with long-tail variants like "UPF fishing clothing production" and "outdoor apparel supply chain" woven into the copy
Image file names:
fishing-upf-hoodie-mens-blue-boat.jpgAlt text: activity + feature ("angler wearing UPF 50 fishing hoodie on offshore boat")
Product schema markup: price, availability, review rating
Phase 6 Deliverables Checklist
Platform live (Shopify or WooCommerce) with SSL, branded domain, and payment gateways connected
2–4 payment methods enabled including BNPL option
Real-time shipping calculator configured; free shipping threshold set
Fit-focused return and exchange policy published
Navigation structure built by activity and product type with UPF and size filters
Product pages live with specs, sizing, social proof, and lifestyle media
3–6 lifestyle images + 1 video clip per SKU produced and uploaded
GA4, Meta Pixel, and TikTok Pixel installed and event-verified
Email capture popup live; lead magnet connected to welcome sequence
Welcome, cart abandonment, and pre-launch email sequences drafted and activated
On-page SEO complete: title tags, meta descriptions, alt text, product schema
Tax rules configured by region; legal pages (privacy, terms, returns) published
Pre-launch subscriber target: 100–300 emails captured before launch day
Total Phase 6 investment: $800–$2,500 over four weeks. The storefront you build here isn't just a checkout tool. It's the first place an angler lands after spotting your brand in a tournament thread or a TikTok reel. You have about four seconds to prove you're the real thing. Build it that way.
Pre-Launch Marketing & Community Engagement
Phase 7 | Weeks 57–64 | Budget: $1,500–$5,000
Your inventory is on the water. That 60-day window before launch day is the most wasted asset in your entire sportswear brand development timeline . Most founders just sit and wait.
Don't wait. Build demand while your shipment clears customs.
The 60-Day Campaign Structure
Run this phase in four separate blocks. Each block has one clear priority:
Days 1–15 — Foundation: Lock your messaging. Publish a landing page. Turn on email capture. Build a 60-day content calendar. Map every post, reel, and email sequence before anything goes live.
Days 16–30 — Teaser Momentum: Post behind-the-scenes sampling footage, fabric tech breakdowns, and founder updates. Show the process. Anglers trust brands that show their work.
Days 31–45 — Audience Building: Launch your waitlist. Pull traffic through creator partnerships and community outreach. Target 500–2,000 email signups in this block. A solid mid-range goal: 1,000 engaged subscribers before launch day.
Days 46–60 — Conversion Ramp: Send out PR packages, kick off influencer collaborations, and push early-bird bundles. Run a countdown email sequence. Open soft-launch beta access to your most engaged subscribers first.
Community-First Channel Mix
The fishing niche rewards specificity. A generic activewear playbook won't work here.
Instagram Reels: angler spotlights, casting motion demos, UPF tech visuals
YouTube: gear review placements and sampling process documentation
Email: waitlist nurture sequences, early-bird conversion, milestone announcements
Niche podcasts and forums: credibility-building before paid traffic ever runs
Send PR packages to micro-influencers and tournament pros before inventory arrives. Focus on creators whose audiences match your target angler segment — bass circuits, offshore charters, kayak tournament communities.
Three partnership formats give you strong returns at this budget level:
Custom tournament jersey runs — visibility across an entire competition field
Charter fleet uniform discounts — repeated on-water exposure across a full season
Podcast and YouTube gear reviews — trust built through voices anglers already follow
Align Messaging to Fishing Season Triggers
Fishing audiences buy on a seasonal clock. Your pre-launch messaging needs to match it:
Spring thaw → tease UPF long-sleeves ahead of bass pre-spawn
Summer bass season → push sun hoodies and moisture-wicking performance
Offshore migration windows → lead with technical protection and durability
Off-cycle messaging falls flat. On-cycle messaging hits buyers right as they're planning their next trip. That's the moment you want to be in front of them.
Phase 7 Deliverables Checklist
60-day content calendar published and scheduled
Landing page and email capture live with lead magnet connected
Waitlist at 1,000+ engaged subscribers before launch day
5–10 micro-influencer or creator partnerships contracted and active
PR packages shipped to tournament pros and fishing content creators
Retargeting audiences built from video viewers, site visitors, and social engagers
Early-bird bundle or exclusive waitlist offer set up in Shopify
Countdown email sequence (T-7, T-3, T-1) drafted and scheduled
20–50 community anchor members recruited to seed launch-day conversation
All content stays consistent across Instagram, YouTube, and email
Total Phase 7 investment: $1,500–$5,000 over eight weeks. The brands that win at launch don't have the biggest ad budgets. They show up in the right fishing communities, tell a believable product story, and build 1,000 warm subscribers ready to buy the moment inventory hits the warehouse.
Official Launch & Inventory Rollout
Phase 8 | Weeks 65–84 | Budget: $600–$2,000
Launch day isn't a finish line. It's the moment your brand stops being a project and starts being a business.
You've spent 14 months building this — the UPF certifications, the field-tested samples, the 1,000-subscriber waitlist. All of it gets tested in the next 48 hours. Here's how to run it without leaving revenue on the table.
Run a Go/No-Go Check 3–5 Days Before Launch
Before the site goes live, confirm these three things are up and running:
Inventory reconciled: Physical count matches your PO within a 1–2% variance. QC-check 5–10% of units per SKU for print defects, fabric flaws, and label accuracy.
Fulfillment live: Run a test order end-to-end — cart to payment to pick-pack. Document your 3PL or self-fulfillment SOP before T-0. Not during it.
Campaign stack ready: Ad sets approved, email sequences scheduled, influencer posting windows confirmed with trackable codes in place.
Miss any one of these and launch day turns into damage control.
The First 48 Hours: Exact Execution
T-0 (Launch hour):
- Take the site off password mode and sync live inventory counts from your WMS or 3PL
- Send your waitlist email and SMS within the first 15–30 minutes — not the next morning
- Activate warm retargeting ads targeting site visitors from the past 30–90 days
Hours 1–24:
- Stagger influencer posts across the day. Schedule three creators at different slots — morning, midday, and evening. This spreads your exposure window and keeps traffic steady instead of spiking once.
- Check ad performance every 4–6 hours . Cut any ad set where CPC hits 2× above average with zero add-to-carts after 300–500 clicks. Scale sets hitting ROAS ≥ 2–3 by 20–30% per step.
Hours 24–48:
- Re-send the launch email to non-openers with a new subject line
- Build lookalike prospecting audiences from your first-day purchasers and waitlist segments. Launch those audiences now.
The Metrics That Tell You the Truth
Ignore vanity numbers. Track these five in your first 7 days:
Metric | Target |
|---|---|
Sessions (first 7 days) | 2,000–10,000 |
CVR — warm traffic | 2–4% |
CVR — blended | 1–2% |
Bounce rate (landing pages) | <50–55% |
AOV | 1.2–1.4× your core product price |
Warm traffic CVR drops below 1.5% ? The issue is almost always one of three things: sizing info isn't clear, the return policy doesn't reassure buyers, or your hero image doesn't show the garment in a real fishing context. Fix the page before scaling ad spend.
Post-Purchase Sequences Built for UPF Apparel
Most apparel brands send a confirmation email and go quiet. That silence costs you reviews, repeat purchases, and word-of-mouth.
Run this four-touch sequence after every order:
Day 0: Order confirmation with a clear ship-date estimate
Days 2–4: Fit tips per SKU — how the fabric stretches, and whether to size up for layering
Days 5–7: Care instructions for sublimation-printed UPF fabrics — cold wash, no bleach, line-dry recommended, plus a sunscreen/oil interaction warning
Day 14 (post-delivery): Review request — ask for a star rating, fit feedback, and use case. Send this only after the order status shows delivered.
That Day 14 email builds over time. Fifty verified reviews with fit-specific feedback will cut your return rate and lift conversion faster than any paid ad.
Inventory Rollout: Wave, Don't Flood
Don't restock on instinct. Use sell-through rate as your signal:
>60–70% sold within 30 days → reorder now; this SKU has proven demand
<20–30% sold in 30 days → hold the reorder; test a promotional push or creative repositioning first
Project your days-on-hand from the first 7–14 days of real sales data. Say a colorway moves at 5 units/day and you have 150 units left — that's about 30 days of stock. Set your reorder trigger at 21–30 days remaining . Early enough to avoid stockouts, late enough to have real sell-through data backing the decision.
Cap first-cycle restocks at 1.0–1.5× your proven sell-through volume . Ordering a second run based on launch-day excitement — instead of actual units sold — is how early-stage private label fishing apparel brands end up with dead stock across three colorways.
Call your first drop Wave 1 . After two full inventory cycles confirm your sell-through, margin, and fill-rate targets, then expand into new colorways, sizes, or channels.
Phase 8 Deliverables Checklist
Before Launch:
- [ ] Inventory received and reconciled (PO vs. physical count, variance <1–2%)
- [ ] QC re-check completed on 5–10% of units per SKU
- [ ] Test order run end-to-end through fulfillment stack
- [ ] Go/no-go review completed 3–5 days before T-0
Launch Execution:
- [ ] Site live; inventory synced to storefront at T-0
- [ ] Waitlist email + SMS deployed within 15–30 minutes of launch
- [ ] Retargeting campaigns active; budget capped at $600–$2,000 per day
- [ ] At least 3 email sends planned: launch announcement, UGC/social proof (Day 2–3), low-stock urgency (Day 5–7)
- [ ] Influencer posting windows staggered with verified tracking codes
Post-Launch Operations:
- [ ] Fulfillment SLA tracking live: target ≥95% of orders shipped within 1–2 business days
- [ ] Customer service templates active: returns, sizing disputes, defect claims, with a <24-hour response target
- [ ] Four-touch post-purchase email sequence activated
- [ ] 7–14 day performance report built: traffic by source, CVR, AOV, sell-through by SKU and colorway
- [ ] Reorder triggers set based on days-on-hand projections
- [ ] Phase 2 product roadmap drafted: winning SKUs flagged for restock, low performers flagged for review
Total Phase 8 investment: $600–$2,000 over eight to twelve weeks. The brands that grow after launch aren't the ones with the biggest opening-day numbers. They track the right five metrics, run the post-purchase sequence, and restock based on real sell-through data — not wishful thinking.
Conclusion
Twelve to eighteen months sounds like a long time. But most failed fishing apparel brands didn't collapse from lack of passion. They collapsed from skipping phases or underestimating UPF certification, supplier vetting, and seasonal timing.
The winning founders aren't the ones with the biggest budgets. They treat this timeline as a system . They hit milestones before spending money. They build community before building inventory.
You now have the complete roadmap. It starts with your first fabric swatch. It ends with your first fishing tournament jersey custom order rolling out the door. Every critical decision point is mapped.
So here's your next step: open a blank document right now. Write down the phase you're in. That one act of honest self-assessment separates dreamers from founders.
Your brand doesn't launch someday. It launches the moment you decide the timeline starts today.